

Who doesn't love capicola? You don't have to be Italian to enjoy a few slices of melt-in-your-mouth "gabagool." If you are Italian, you might remember your uncles curing the meat in the spring to hang in the cellar. Spring was often the only season with the perfect temperature and humidity of the root cellars and caves in the Old Country. They would make enough to enjoy year round, since that was their one chance for the ideal conditions.
With UMAi Dry®, you don't need to worry about seasonality, perfect temperatures or meat funky cellars. As we say, "No cave? No problem." The UMAi Dry membrane allows you to make authentic traditional capicola in the ease and comfort of your kitchen fridge.
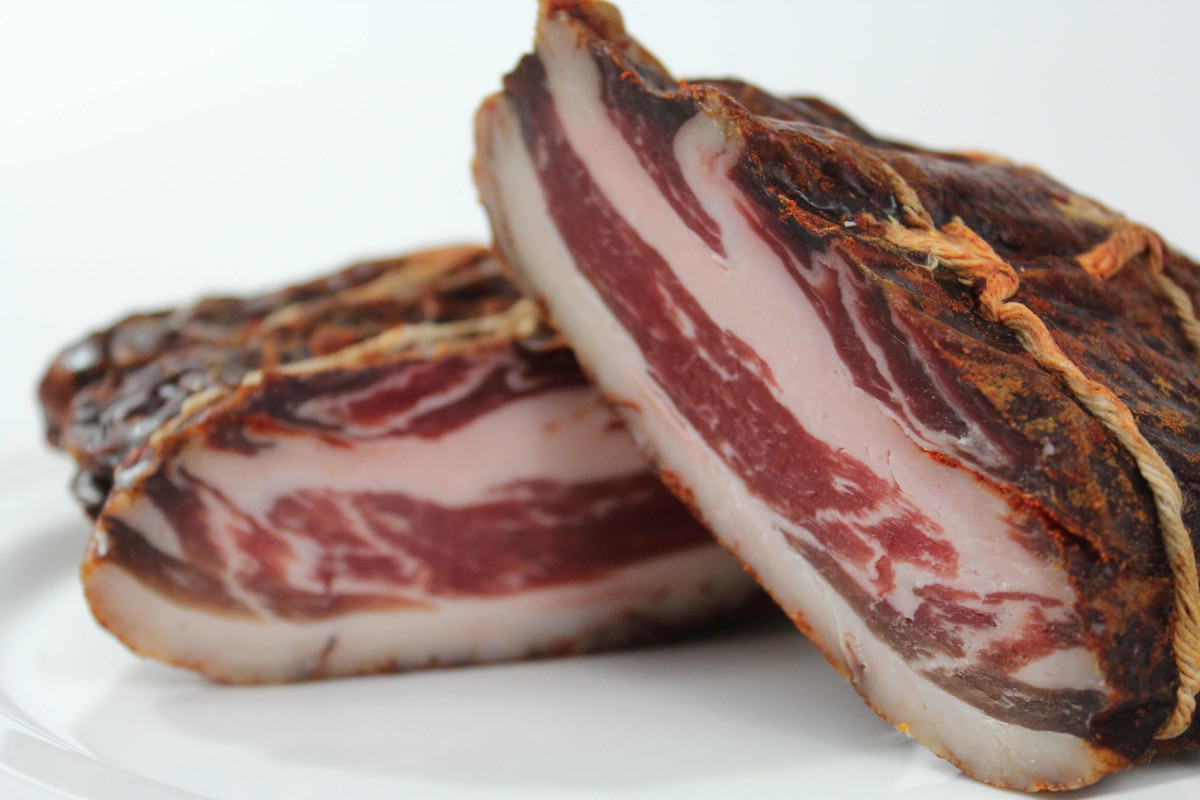
Charcuterie, cured and dried whole muscle preserved meat, is the simplest form of meat craft. Less expensive than dry aging a full subprimal steak cut. Less mess than grinding, stuffing, fermenting and drying salumi. Whether you coat the outside with paprika and cayenne, or keep it mild, slices of capicola are just as welcome on a fancy charcuterie board as they are in a nice meaty Italian hoagie.
One UMAi Dry Simple Capicola Kit helps you make one to five pounds of capicola. With the Kit, you to skip the math, the scale and the need for a half a dozen spices for the recipe. Charcuterie Simple Kits include three UMAi Dry Charcuterie Large bags and one packet each of the Premixed Curing Salts Blend and Capicola Spice Blend--each perfectly formulated for five pounds of meat.
Capicola making is as easy as this:
- Buy a piece of pork, trimmed to shape weighing one to five pounds.
- Coat with the Premixed Curing Salts and Capicola Spice Blend, then put into a vacuum bag or ziplock. Refrigerate for two weeks to cure.
- Remove from curing bag, rinse, and seal into the UMAi Dry membrane. Rest on an open wire rack in your regular fridge. Wait for the 35-40% weight loss.
Traditionally, capicola is made from just the coppa, or "money muscle" in the center pork shoulder. Since it can be impossible to find a butcher these days who knows how to find this cut, feel free to use a nicely marbled and shaped piece of pork shoulder. In a pinch, you can just use a chunk of pork loin. The loin lacks the intramuscular fat for a lacy-looking capicola slice, but it's inexpensive, easy to work with, and has a great shape for slicing!
UMAi Dry also offers Easy Kits for Lonzino and Bresaola, as well as refills for the Premixed Curing Salts and all three Charcuterie Spice Blends.
If you have a digital scale and want to calculate the 3% kosher salt and 0.25% #2 Curing Salt, you can use the recipe below with an UMAi Dry Charcuterie Kit--enough for five charcuterie projects, large and small.
For all the charcuterie basics and helpful videos, check out the UMAi Dry Academy--where you become a meat crafting pro.
Traditional Capicola
UMAi Dry
Italian
Charcuterie
Charcuterie is one of the finest -- and most traditional -- ways of preserving meat. It is also one of the simplest and most impressive types of meat craft. Capicola is amongst the most popular types of Italian cured meats -- traditionally made in spring time when the climate is just right -- UMAi Dry makes it possible to craft and dry sausage at any time of the year in any part of the word -- in the comfort of you home fridge.
Ingredients
Essential Basic Ingredients
- Pork coppa muscle 5 lbs. (2.2 kg) or well marbled piece of pork shoulder trimmed to shape
NO MATH Easy Method: UMAi Dry Spice and Salts Blends
- UMAi Dry Capicola Spice Blend for 5 lb Recipe
- UMAi Dry Premixed Curing Salts Blend for 5 lb Recipe
MATH Method: Make Your Own Spice Blend
- Kosher Salt 3% to weight of meat
- #2 Curing Salt 0.25% to weight of meat
- Juniper berries, crushed 1 tbsp (4g)
- Sugar 2 tbsp (30g)
- Black pepper, coarsely ground 2 tbsp (4g)
- Bay leaves, crumbled 2 (2g)
- Freshly grated nutmeg 1/2 tsp (1g)
- Garlic, minced 2 cloves
Directions
STEP 1: CURE MEAT
- If not using UMAi Dry’s Premixed Curing Salts Blend, weigh out correct ratio of #2 Curing Salt and Kosher salt
- Mix salts and seasonings Rub into entire surface of meat.
- Tuck into zipper bag or vacuum seal to cure in fridge for 14 days. Turn every couple days to maintain even coverage of cure over the entire surface of the meat.
STEP 2: PREPARE TO DRY
Make sure meat surface is sticky-moist to create best bond with UMAi Dry® membrane.
- Coat with any dry curing coating spices and tie to shape - Massage into surface to create the sticky coating needed to bond with membrane. - If making rolled pancetta, roll and tie. Re-moisten surface with water to assist meat to membrane bond
STEP 3: SEALING UMAI DRY
Choose your sealing method, check out our basics page for in-depth instructions
STEP 4: DRYING
Take start weight and record target finish weight. Record both weights on the stickers provided.
- Rest the sealed meat in refrigerator on open wire rack in in a modern frost free fridge to ensure excellent air circulation to entire meat surface.
Drying time depends on meat size. Meat should lose 35-40% of Direction Drying time depends on meat size. Meat should lose 35-40% of weight over 30-120 days.
STEP 5: EQUALIZING, STORING & SLICING (UMAI!)
Upon reaching target weight, peel away UMAi Dry. Wipe off any white mold with wine vinegar. Meat will be firm, dry and pleasantly aromatic.
- Vacuum seal in storage bag for a week to equalize the moisture edge-to-edge.
- Preserve texture and quality by refrigerating or freezing in vacuum storage bag.
- Slice paper thin—and enjoy! Meat will be translucent and deeply colored.


