CRAFT DRY AGED STEAK AT HOME: THE UMAi DRY GUIDE
As experts in the art of meat craft, we have curated a step-by-step process teaching you how to make dry aged steak at home. Our UMAi Dry® system is based on a unique breatheable membrane technology that provides a perfect environment for each piece of meat to develop that special dry aged taste and texture that people crave. The meat is always protected from mold, bacteria, and odors while aging. The Dry aging process has two parts:
- Moisture evaporates from the meat, thereby concentrating and intensifying the beef flavor
- Natural enzymes in the meat break down the connective tissue thereby tenderizing the meat and imparting a distinct dry aged flavor
Step 1: Select Your Meat
Always dry age whole, sub primal cuts (not individual steaks) for the best results. We recommend Ribeye, Entrecote in Europe (Scotch filet in Australia), NY Strip (Striploin), or Sirloin. You can dry age Tenderloin (filet mignon) but only for short period of time (4-5 days) as not to lose expensive tender meat to trim.
Step 2: Transfer Meat
Use the clean transfer method and keep the seal area free of liquids to ensure the best heat seal. Wipe the opening of the bag with a paper towel prior to sealing.
Step 3: Sealing the Meat in UMAi Dry
We recommend sealing your UMAi Dry bag at a 45 degree angle due to the commonly narrow sealing bar on most heat sealers. Position the meat at a 45 degree angle to the sealer and grasp the opening of the bag in your hand to create some wrinkles for better airflow and then seal the corner. Since our UMAi Dry bags melt at a slightly higher temperature than other drying bags, seal the bag a 2nd time for 20 seconds. Wait until the material is cool to check the seal and make sure it is transparent.
Next, reposition the meat parallel to the heat seal and insert the VacMouse vacuum aid strip to allow air to be drawn out by the vacuum pump in the sealer. Massage the air out of the bag corners and meat crevices while the vacuum is running. UMAi Dry does not require an absolute vacuum, making it easier for meat crafters to learn how to make dry aged steak at home.
The purpose of vacuum sealing is simply to bring your UMAi Dry bag into contact with the meat to allow for efficient moisture release.
Add a label with your anticipated dry aging start and end date. We recommend dry aging steak for 21-45 days in your UMAi Dry bag.
Step 4: Refrigerate Meat
Place your UMAi Dry bag in a modern, full size refrigerator that effectively controls the humidity to draw the moisture out of the inner environment of the refrigerator. Fun Fact: Moisture evaporation stage lasts for about 7-10 days. The tenderization and flavor development stage lasts as long as the meat is being dry aged. We have customers who dry age for up to 100 days in UMAi Dry bags! Step
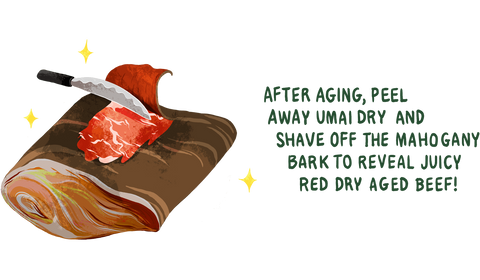
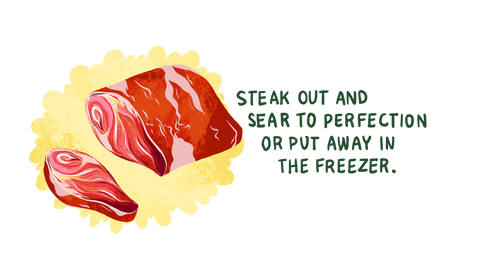
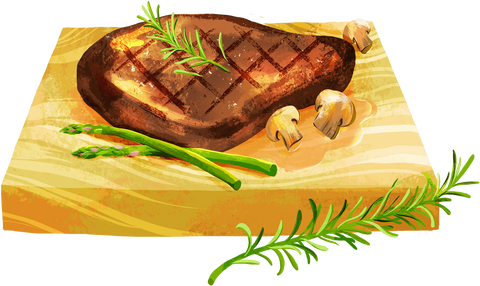
Step 5: Trim, Steak Out, & Let’s Eat!
After the desired aging period, the meat can be removed from the UMAi Dry bag and cut into steaks. The bark that has formed on the meat is usually easiest to trim off after cutting the individual steaks. Any remiaing steaks that won't be cooked within a couple days can be vacuum sealed into a Foodsaver type bag and stored in the freezer for up to a year.
THE DRY AGING PROCESS: WHAT TO EXPECT
DAY 1 At least 75% of the meat surface is in contact with the UMAi Dry membrane. And your kitchen might be a mess.
DAY 2 UMAi Dry will relax, and may appear loose as it takes up moisture from the meat. There may be moisture pooling in the corners; let time and your fridge take care of that.
DAY 4-5 Bond begins to form; you may notice color change.
DAY 10 The meat should begin to turn mahogany brown. You may begin to catch an earthy, blue-cheesy, nutty scent.
DAY 21 The bark is firm and dark, mostly even in color, and almost firm enough to “knock” on. There may be softer and firmer spots. Small white dots may be salts, fat or mold, which is OK. Grey, blue, green, or black mold is bad news.
DAY 28-45 The meat is firm and dark, and may begin to pull away from the UMAi Dry membrane. Separation is normal— the meat is still protected in its “custom dry aging space.”
UMAi Dry® Aging Steak at Home Process Illustration: